Installing an Artiteq Click Rail Pro picture rail is simple and allows you to hang pictures or other objects in an aesthetic and flexible way. Here is a step-by-step guide to installing this system:
Materials needed:
- Click Rail Pro and its accessories (fixing clips, corner or straight connectors, finishing tips).
- Screws and dowels suitable for your wall type.
- Drill , screwdriver, and possibly a hammer.
- Spirit level or laser to ensure straight installation.
- Meter or ruler for measuring.
- Optional: hacksaw to cut the rail to the correct length.
Installation steps:
1. Prepare the tools and the wall
- Clean the area of the wall where the rail will be installed.
- Check that the wall is in good condition and does not have any cracks.
2. Draw the laying line
- Decide at what height to install the picture rail (often close to the ceiling for a discreet finish).
- Using a spirit level, draw a straight line on the wall to guide the attachment of the clips.
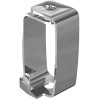
3. Fix the wall clips
- Clip spacing: Place a clip every 30-40cm to ensure a good hold. Add clips at each end and near the joints between rails.
- Drill the holes along the marked line, insert the anchors if necessary, then screw the clips to the wall.
4. Install the rail
- Connecting the Tracks: If you are using multiple sections of track, use the supplied connectors to align them neatly.
- Snap the rail onto the clips by pressing firmly. The audible "click" confirms that the rail is securely attached.
5. Add the finishing tips
- Place the end caps on the ends of the rails for a clean and aesthetic finish.
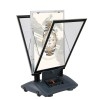
6. Install cables and hooks
- Insert the suspension cables (perlon, steel or rigid rod) into the rail.
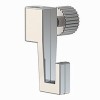
- Add the hooks suitable for your frames or objects.
- Adjust the height of the cables and hooks as needed.
Additional tips:
- Weight Capacity: The Click Rail Pro supports up to 50kg/m, ideal for heavy frames. Make sure to use the correct hooks and cables.
- Cutting the Rail: If a rail is too long, cut it with a hacksaw and file the edges for a clean finish.
- Cleaning: Clean the rail after installation to remove any dust or marks.
By following these steps, you will obtain a well-fixed picture rail, ready to accommodate your frames or decorations with a professional and elegant finish.