Installing Artiteq 'sClick Rail is quite simple and follows a few key steps. This system is designed to make hanging artwork easy while being discreet and elegant. Here is a step-by-step guide to help you install this system:
Materials needed:
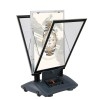
Artiteq Click Rail picture rail system (including the bar, fixing clips, hooks and cables or wires for hanging the works).
A tape measure .
A spirit level .
A drill with suitable bits (depending on your wall type).
Choosing the location : You need to determine where you want to install the chair rail. Typically, the chair rail is installed about 2 meters from the ground, but this can vary depending on the space and your preferences.
Mark the location : Using the tape measure , measure and mark the spot where you want to install the picture rail. Use the spirit level to check that the line is perfectly straight, so that your picture rail is horizontal.
2. Prepare the fixings
Bar fixings : The Click Rail is fixed to the wall using fixing clips. To do this, you must first measure and mark the fixing points on the wall.
If you are installing the picture rail on a concrete or brick wall, drill holes at the marked locations and insert the appropriateanchors .
If you are installing on a plasterboard wall, you will need to use special anchors to ensure a solid fixing.
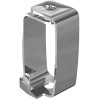
3. Attach the picture rail clips
Using the drill , drill the holes at the marked locations. Make sure to use screws suitable for your wall type (concrete screws, plasterboard screws, etc.).
Insert dowels into holes if necessary.
Screw the fixing clips (often supplied with the Click Rail system) into the wall plugs. You can place the fixings about 40cm apart, but this will depend on the length of the picture rail and the weight of the artwork you plan to hang.
4. Install the Click Rail bar
Once the clips are fixed to the wall, you can install the Click Rail bar . This bar is designed to easily clip into the fixings.
Insert the bar securely into the clips and check that it is securely in place.
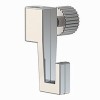
5. Attach hooks and cables
Once the picture rail is installed, you can add the hooks and cables to hang your works.
Clip the hooks onto the Click Rail bar at the desired location.
Hang the cables or wires on each hook, then adjust the length of the cable according to the size of your works.
You can also add hanging hooks to precisely adjust the height of your artwork.
6. Check the installation
Once everything is installed, check that your artwork is hanging properly and that the picture rail is stable. Make sure the bar is secure , the hooks are secure , and that your artwork is hanging at the desired height and location.
Practical advice:
If you have multiple sections of picture rail to install, make sure the joints between the sections are aligned properly for a neat finish.
If you have fragile walls (such as plaster), be sure to use special anchors to ensure a solid fixing and prevent the picture rail from falling over time.
For an even more aesthetic result, you can use thin or discreet cables to hang your works.
With this system, you will be able to hang your works easily and professionally, while having the possibility of moving them quickly if necessary, without drilling each time!
Share this content
We use cookies to improve your shopping experience. You will be able to select our and third-party cookies that you wish to use at any time.