Installing a flower pot with Artiteq picture rails is a great idea to combine wall decoration and greenery. Here are the general steps to carry out this installation:
Materials needed:
- Artiteq picture rail (rail, cables, hooks, etc.).
- Flower pot holder compatible with Artiteq cables or hooks.
- Lightweight flower pot (ideally with a base suitable for the stand).
- Screws and dowels to fix the picture rail to the wall.
- Drill, spirit level, screwdriver.
Installation steps:
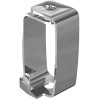
1. Install the Artiteq picture rail
- Rail fixing:
- Mark the position where you want to install the rail on the wall.
- Drill holes and secure the rail brackets with screws and dowels.
- Clip the rail into the brackets.
2. Prepare the suspension system
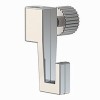
- Insert the suspension cables or wires into the rail.
- Choose a hook that can support the weight of your flower pot and stand.
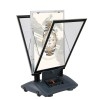
3. Attach the flower pot to the stand
- Hang a holder specifically designed for flower pots (such as circular or mesh holders that fit hooks).
- Make sure the pot is stable and centered in the holder.
4. Adjust the height
- Slide the hook or cable to adjust the height of the pot to your preference.
Additional tips:
- Weight: Use a lightweight pot (such as plastic or resin) and lightweight potting soil to avoid overloading the system. Check the weight limits of the hooks and rail.
- Safety: Make sure the system is securely fastened to avoid any risk of falling.
- Care: Place a small saucer under the pot to collect excess water or choose plants that require little watering.
With this system, you can easily change the position or type of decoration according to your desires, while keeping an elegant and green interior.